
Image Gallery ::
Excelite's Modified CPS 2500
All content and images are used with permission. Content and images are provided for personal use only. Not for redistribution.
Commentary by Excelite | Posted: 20020101
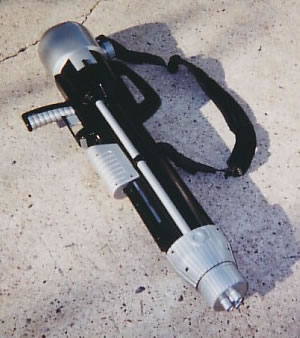
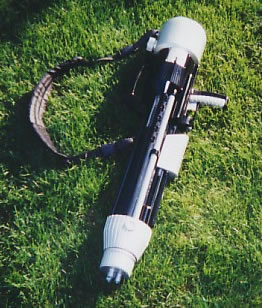
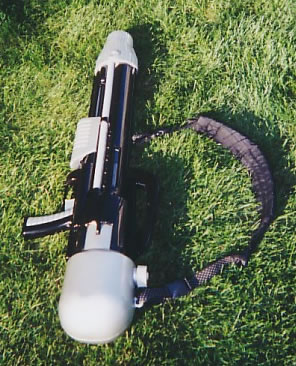
Here are some pictures of my custom CPS2500.
I took off the stickers and lightly sanded the blaster first. Next, I took it apart and painted the main body of the blaster black (used to be grey) and the detailed parts silver (used to be orange/red and purple). I only painted the parts that would be visible during combat. Lastly, I used two coats of a clear acrylic spray to protect my paint job and add a metallic shine. It holds up very well. The black paint has not chipped yet and the silver paint has only chipped very slightly near the nozzle. The custom strap was made of straps stolen from an old backpack. I also stole the clips from the backpack and added them to the strap. This resulted in a fully adjustable, comfortable strap that can be easily, and quickly clipped on and off. I have considered adding a laser pointer or flashlight to the front, but am unable to find a suitable one.
I have an interesting fact about the CPS2500:
It has an extra "shotgun" spray setting. First, turn the nozzle cover so the blaster is at the 20x setting. Then turn the nozzle cover very slightly to the left or right so the nozzle opening is approximately half covered by the nozzle covering. The nozzle opening should be in a "crescent moon" like shape. When fired with this nozzle position, the water spreads out over a wide area and the shot time is increased slightly. It's very useful for playing a one-hit kill game as you can soak over a huge area. This probably can be used with other blasters that have a "turn the nozzle cover" nozzle adjustment style, although I have not tested it on others yet.
 |
 |
 |